Wedding nails for the bride are the perfect finishing touch to a flawless wedding look. When you step into the ceremony, your nails should reflect the romance, elegance, and confidence you feel. Whether you are exchanging rings in a grand cathedral or walking barefoot on a sandy beach, your hands will be center stage in every photograph—from the close-ups of the ring exchange to the candid shots of you holding your bouquet. This guide walks you through every step—from choosing the right style to maintaining them all day long—so you can shine without worry.
Wedding Nails for the Bride: The Ultimate Guide
Choosing the right nails for your wedding is more than a cosmetic decision; it’s a way to express your personal style while keeping practicality in mind. The modern bride is no longer limited to a standard white polish. Today, bridal beauty is about balance—blending timeless tradition with personal flair. Whether you prefer a classic French tip, a subtle sparkle, or a bold, modern design, the key is to pick something that feels authentic to you and complements your dress, veil, and accessories.
Know Your Wedding Theme and Aesthetic
Start by matching the nail style to the overall wedding vibe. Your manicure should feel like a cohesive part of your bridal ensemble rather than an afterthought. Consider these common themes:



- Rustic or Garden: These settings call for soft, muted hues. Think sage greens, dusty roses, or sheer peaches. Floral accents or a soft “milky” white base blend beautifully with natural surroundings.
- Glamorous Ballroom: For high-luxury events, don’t be afraid of a bit of drama. Metallics, intricate lace patterns, or a full-set of Swarovski crystals can mirror the opulence of a ballroom.
- Modern Minimalist: If your dress is a sleek slip or a structured column, opt for “quiet luxury.” A sheer nude, a matte finish, or a single, ultra-thin metallic line creates a sophisticated, architectural look.
- Bohemian Chic: Earthy tones, gold leaf, and asymmetrical designs work well here. Consider a “negative space” manicure where parts of the natural nail are left exposed.
Beyond the theme, consider the color of your dress. A stark white dress pairs beautifully with a crisp white or silver nail, while ivory or champagne gowns look better with cream, gold, or soft nude tones to avoid a clashing contrast.
The Bridal Nail Timeline: When to Book and Prep
Timing is everything. A last-minute manicure can lead to stress or, worse, a rushed job that chips before the vows. To ensure perfection, follow this timeline:
Two Weeks Before: Focus on nail health. Start applying a hydrating cuticle oil daily and avoid any harsh chemical treatments or aggressive filing. This ensures your nail bed is strong and hydrated.
One Week Before: This is the ideal time for a professional gel or acrylic manicure. Gel is highly recommended for brides because it resists chipping and maintains a high-gloss finish for up to 14 days. If you are doing a DIY manicure, this gives you time to test the color against your dress.
48 Hours Before: Perform a gentle exfoliation on your hands and a hydrating mask. This prevents dry skin from appearing in those high-definition ring photos.
Step-by-Step: Professional DIY Manicure at Home
If you prefer the intimacy of a home manicure, you can achieve salon-quality results by following a disciplined process. Here is the professional sequence for durable wedding nails:
- Trim and Shape: Start by trimming your nails to a manageable length. For brides, an almond or oval shape is often preferred as it elongates the fingers and is less likely to snag on delicate lace or tulle.
- Cuticle Care: Gently push back cuticles with a wooden orange stick. Avoid cutting them deeply, as this can cause inflammation or redness on the big day.
- Buffer the Surface: Lightly buff each nail with a fine-grit buffer to remove natural oils and shine. This creates a “tooth” for the polish to grip onto.
- Cleanse: Wipe each nail with a lint-free pad soaked in isopropyl alcohol or nail polish remover to ensure a completely clean surface.
- Apply a Base Coat: Never skip this. A quality base coat prevents staining (especially with darker colors) and smooths out ridges in the natural nail.
- The Color Phase: Apply two thin coats of your chosen polish. Thin layers dry faster and are less likely to bubble or peel than one thick coat.
- Topcoat for Longevity: Finish with a high-performance topcoat. If using traditional polish, apply a new layer of topcoat every two days leading up to the wedding to keep the shine fresh.
Simple Wedding Nails Ideas for the Minimalist Bride
For brides who love minimalism, simple wedding nails are a smart choice. These designs keep the focus on your bridal look while still adding a touch of glamour. Here are a few ideas that are timeless and effortless:
- The Milky White: Instead of a stark, opaque white, choose a semi-translucent “milky” shade. It looks softer, more natural, and is incredibly forgiving if there are minor imperfections in the application.
- The Micro-French: A modern take on the classic. Instead of a thick white band, use a needle-thin line of white or pearl at the very tip. It’s subtle, chic, and elongates the nail.
- The Glazed Donut: Popularized by modern trends, a sheer nude base topped with a chrome powder creates a pearlescent, ethereal glow that catches the light beautifully.
- Satin Matte: Swap the usual glossy topcoat for a satin or matte finish. This creates a velvet-like appearance that feels contemporary and understated.
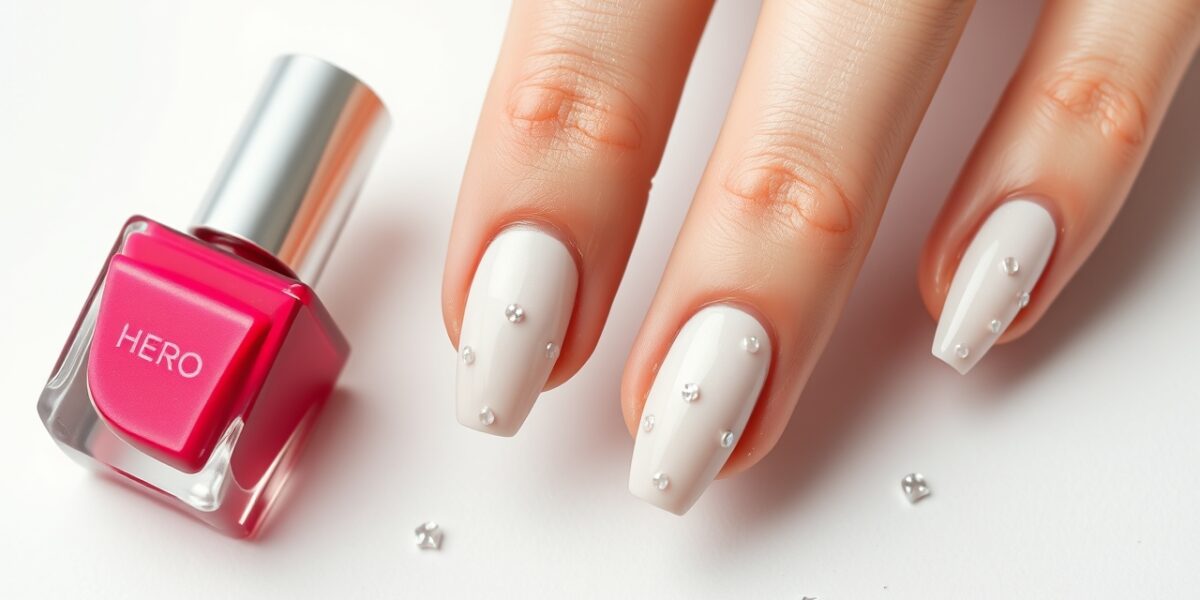
- Single-Point Accent: A tiny, single rhinestone or a miniature pearl placed at the base of the ring finger adds a hint of bridal sparkle without overwhelming the hand.
Elegant Bridal Manicure Techniques for Added Flair
When you want to elevate your nails to a statement piece, consider these elegant techniques. These add a layer of artistry while remaining sophisticated.
- Ombré Gradient: Blend two complementary colors—such as a soft blush fading into a crisp white—from base to tip. This creates a seamless, romantic transition.
- Gold or Silver Foil: Apply small, irregular flakes of metallic foil over a neutral base. This looks like organic art and pairs perfectly with metallic jewelry.
- Negative Space Geometry: Leave a crescent of the natural nail exposed at the base or create a thin vertical line down the center. This is a high-fashion look that feels very clean.
- Hand-Painted Florals: Using a detail brush, paint a single, tiny white jasmine or lily of the valley on one nail. Keep the scale small to maintain a refined aesthetic.
- The Velvet Effect: Use magnetic “cat-eye” polish in a champagne or silver tone to create a shimmering, three-dimensional depth that looks like fabric.
Bridal Nail Designs for Every Season
Seasonal considerations can help you pick colors that complement the weather, the lighting, and your floral arrangements.
- Spring: Focus on “awakening” colors. Soft sage greens, blush pinks, or lavender tones pair well with fresh peonies and cherry blossoms.
- Summer: Embrace brightness and warmth. Bright coral, turquoise, or a champagne sparkle look stunning against sun-kissed skin and beachy backdrops.
- Autumn: Lean into richness. Warm terracotta, deep burgundy, or burnt orange accents echo the changing foliage and cozy vibes of a fall wedding.
- Winter: Go for contrast and sophistication. Classic stark white, icy silver, or even a deep navy or forest green can add a dramatic, regal touch to a snowy setting.
Maintenance and Emergency Kits for the Wedding Day
Even the most expensive manicure can face challenges during a 12-hour wedding day. From champagne glasses to lace dresses, your nails are exposed to many hazards. Build a “Nail Emergency Kit” for your bridal suite:
- Clear Topcoat: A small travel-sized bottle can quickly seal a chip or restore shine if your nails look dull by the reception.
- Cuticle Oil Pen: Apply a quick swipe of oil before your photos. This hydrates the skin around the nail, making your hands look plump and polished in close-ups.
- Glass Nail File: Unlike emery boards, glass files seal the edge of the nail, preventing snags on your veil or dress.
- Alcohol Wipes: Perfect for removing any accidental smudge of lipstick or makeup from your nails before the ceremony.
- Hand Cream: Use a non-greasy, fast-absorbing lotion to keep your skin soft without leaving oily marks on your dress.
Common Mistakes to Avoid
Avoid these common pitfalls to ensure your wedding nails remain flawless:
- Trying a Brand New Color the Day Before: Never experiment with a color you’ve never worn right before the wedding. You might find the shade clashes with your dress under the venue’s specific lighting.
- Over-Filing the Nails: Filing too aggressively to achieve a specific shape can weaken the nail plate, leading to painful breaks during the wedding festivities.
- Skipping the Base Coat: Neglecting this step can lead to “staining,” where the pigment seeps into the nail, making it difficult to remove and leaving a yellow tint.
- Applying Polish Too Thickly: Thick layers often trap air, leading to bubbles and a longer drying time, which increases the risk of smudging.
- Ignoring the Cuticles: A beautiful color on a dry, peeling cuticle looks unfinished. Prioritize hydration in the week leading up to the event.
FAQs
1. What are the best wedding nails for the bride that last all day?
For maximum durability, gel polish or acrylics are the gold standard. They are resistant to chipping and maintain a high-gloss finish. If you prefer traditional polish, ensure you use a high-quality long-wear formula and seal it with a professional-grade topcoat.
2. How can I add a touch of sparkle without looking over-the-top?
The key is “strategic placement.” Instead of full glitter nails, try a single rhinestone at the cuticle of the ring finger, a thin metallic line along the edge, or a subtle pearlescent chrome powder over a nude base.
3. Can I do my wedding nails at home, or should I go to a salon?
Both are great options. A salon visit is ideal for complex art, gel extensions, or if you want a relaxing pampering session. A DIY manicure is perfect for minimalist looks and allows you to control the exact shade and timing.
4. What should I do if my nails chip during the ceremony?
Don’t panic—most chips are invisible to guests. If it’s noticeable, use a tiny bit of clear topcoat to smooth the edge. If you have a matching polish in your emergency kit, a quick dab can fix the gap.
5. How do I choose between a square, almond, or oval shape?
Almond and oval shapes are generally the most flattering as they elongate the fingers and look timeless. Square nails are more modern and bold but are more prone to snagging on fabric. Choose the shape that feels most comfortable for your daily activities.
For more detailed nail care tips and professional product recommendations, visit Nail Made Simple and explore their extensive guides on bridal beauty.
Remember, the best wedding nails for the bride are those that make you feel like the most beautiful version of yourself. Whether you go for a sheer, natural look or a shimmering statement, your confidence is what will truly make your bridal look shine from the first look to the last dance.
Leave a Reply