best base coat and top coat are essential components of any successful nail art routine, acting as the foundation and finish that protect and enhance your creations.

Why You Need the Best Base Coat and Top Coat
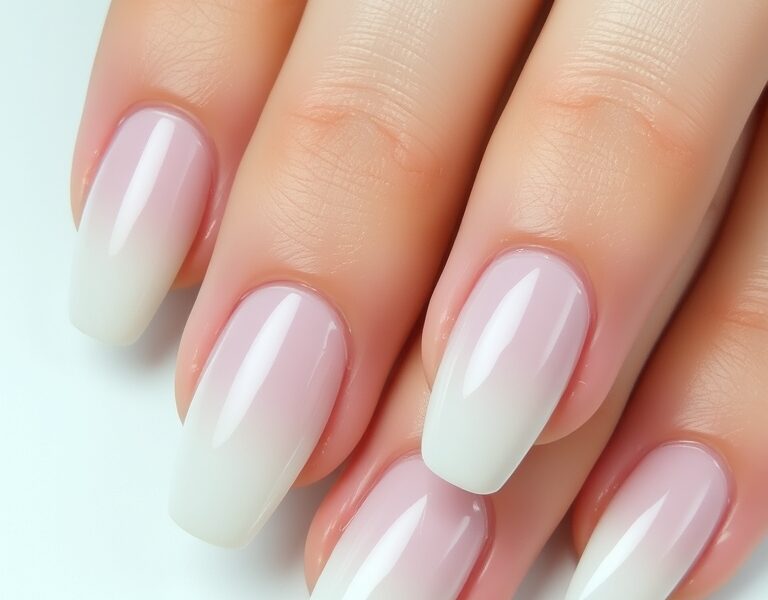
When you think about a well‑finished manicure, you might picture the vibrant polish and intricate designs. But beneath the surface, the best base coat and top coat work quietly to safeguard your nails, extend the life of your art, and give that coveted high‑gloss shine. A good base coat seals the natural nail, prevents staining, and creates a smooth canvas that allows polish to adhere evenly. A top coat, on the other hand, seals the polish, adds shine, protects against chips, and can even provide a subtle satin finish if you prefer.
The Best Base Coat and Top Coat: What to Look For
Choosing the best base coat and top coat can make the difference between a manicure that lasts a week and one that fades in a day. Here are the key qualities to seek:


- Non‑Acetone Formula: Acetone can dry out nails and cause irritation. Look for water‑based or quick‑dry formulas that protect without stripping natural oils.
- Fast‑Drying Time: You’ll appreciate a product that dries in a minute or two, especially if you’re applying multiple layers.
- No Yellowing: Yellowing is common with low‑quality bases. Opt for clear, non‑yellowing bases that keep your natural nail color bright.
- High‑Gloss Finish: A top coat that delivers a mirror‑like shine will make your nail art pop.
- Long‑Wear Protection: Look for UV resistance and chip‑resistance if you want your manicure to survive daily activities.
Common Base Coat Types
There are mainly two types of base coats: gel‑style and water‑based. Gel‑style bases are perfect for those who enjoy a quick, hard finish that can be sealed with a UV or LED lamp. Water‑based bases are ideal for everyday wear, offering a softer feel and easy removal with nail polish remover.
Common Top Coat Types
Top coats come in several finishes: high‑gloss, satin, matte, and even glitter. The high‑gloss top coats are the most popular for a classic, polished look. Satin top coats give a subtle, less shiny finish, while matte top coats are great for a modern, edgy vibe. Choose the finish that best complements your nail design.
Choosing the Right Base Coat for Your Nail Type
Not all nails are created equal. Factors such as nail thickness, growth rate, and pre‑existing conditions influence which base coat will work best.
- Thin or Porous Nails: Opt for a thick‑set base that fills in gaps. A “filling” base coat with a mild polymer can smooth the surface and reduce the chance of polish cracking.
- Thick or Overgrown Nails: A lightweight, fast‑dry base will prevent the polish from feeling heavy and reduce the risk of breakage.
- Sensitive Skin or Allergies: Choose fragrance‑free, hypoallergenic formulas. Look for products labeled “acetone‑free” and “non‑paraben.”
- Color‑Changing Nails: If you enjoy neon or metallic shades, a base coat that resists color bleeding is essential. Look for “color‑protect” bases that lock in pigment.
Top Coat Innovations: Gel vs. Regular
Gel top coats have surged in popularity because they offer a thick, durable finish that can be cured under a lamp. However, they also require a specific removal process and can be more expensive. Regular top coats, on the other hand, are versatile, inexpensive, and can be applied to both gel and conventional polish.
Choosing Between Gel and Regular:
- For Long‑Lasting Glam: Gel top coats with UV/LED curing provide 10‑12 days of wear. Ideal for bridal parties or travel.
- For Everyday Use: Regular top coats are perfect for quick, on‑the‑go manicures. They can be buffed or sanded for a matte look.
- For Cost‑Effectiveness: Regular top coats are significantly cheaper and don’t require a lamp. They’re also easier to remove with standard nail polish remover.
Step‑by‑Step Base Top Coat Guide
Follow these steps to apply the best base coat and top coat for a flawless manicure:
- Prep Your Nails: Start with clean, dry nails. File and shape them, then push back cuticles gently. Remove any residue with a nail buffer or a soft cloth.
- Apply the Base Coat: Use a thin, even layer. Avoid over‑applying; a thin coat dries faster and reduces the chance of bubbles. Let it dry for 30–60 seconds.
- Apply Your Polish: Paint in two thin layers, allowing each to dry fully. This prevents streaks and ensures a vibrant color.
- Seal With the Top Coat: Apply the top coat the same way—thin, even, and allowing it to dry between layers. For added durability, apply a second thin layer.
- Final Touches: Buff the top layer lightly if you prefer a matte finish, or leave it glossy. Finish with a quick wipe of a lint‑free wipe to remove any fingerprints.
When selecting the best base coat and top coat, consider your lifestyle. If you’re constantly on the go, a chip‑resistant top coat is a must. If you love a glossy look, choose a top coat that offers a high‑gloss finish without compromising longevity.
Common Mistakes to Avoid
Even seasoned nail artists can slip into habits that shorten a manicure’s lifespan. Here’s what to watch out for:
- Skipping the Base Coat: Without a base, polish can cling unevenly and cause staining.
- Over‑Applying Top Coat: Thick layers can crack or peel. Stick to thin, even layers.
- Neglecting Drying Time: Applying the next coat before the previous one has fully cured invites bubbles and unevenness.
- Using the Wrong Removal Method: For gel nails, never use acetone on a regular top coat; it will strip the polish and damage the nail.
- Ignoring Nail Health: Over‑polishing can weaken nails. Give them a break every 4–6 weeks.
DIY Nail Art Protection Hacks
Protecting your nail art doesn’t have to be limited to top coats. These simple hacks extend durability:
- Use a Clear Nail Polish as a Quick Fix: If you’re in a hurry, a single clear coat can seal a fresh design for a few days.
- Apply a Matte Finish with a Small Brush: For a subtle matte look, use a fine brush to dab a satin top coat over the entire nail.
- Layer with a Protective Gel Shell: For high‑wear jobs (e.g., construction), apply a gel shell after the top coat for extra protection.
- Keep a Nail Polish Wipe Kit Handy: A quick wipe can remove fingerprints and smudges between coats.
- Store Nails in a Cool, Dry Place: Excess heat can soften the top coat and cause chips.
When to Skip Base or Top Coat
There are rare scenarios where you might skip one or both layers. However, these are exceptions rather than the rule.
- Quick Touch‑Up: If you’re only doing a quick touch‑up on a single nail, a base coat may be skipped to save time.
- Low‑Impact Activities: For a short, low‑impact event where you won’t be using your hands extensively, a top coat might be omitted.
- Allergy to Specific Ingredients: If you’re allergic to a component in a base or top coat, look for hypoallergenic alternatives instead of skipping.
- Professional Gel Manicures: Many gel polish systems include a built‑in base and top coat, so additional layers are unnecessary.
Long Wear Top Coat: How to Maximize Longevity
Even the best top coat can lose its shine or start to chip if not applied correctly. Here are advanced tips to help your top coat last longer:
- Apply Thin Layers: Thick layers dry unevenly and can crack. Thin layers build up gradually and seal better.
- Buffer Between Layers: Lightly buff the surface between each top coat application to remove any surface imperfections.
- Use a UV or LED Lamp (If Available): Some top coats are formulated for lamp curing. This can significantly extend wear time.
- Avoid Water Exposure: Prolonged contact with water can soften the top coat. Wear gloves when washing dishes or doing chores.
- Maintain Nail Health: Keep nails moisturized with cuticle oil and hand cream to prevent dryness, which can cause premature chipping.
With the best base coat and top coat combination, you create a strong shield that protects your nail art from everyday wear. The result is a manicure that looks fresh, glossy, and intact for days.
Frequently Asked Questions
- best base coat and top coat – Why are they necessary?
- The base coat protects the natural nail and ensures smooth polish adhesion, while the top coat seals the polish, adds shine, and prevents chipping. Skipping either layer often results in a shorter‑lived manicure, uneven color, and potential staining of the nail bed.
- How many layers of top coat should I apply?
- Two thin layers are usually sufficient for most polish types. A third layer can be added for extra durability—especially on high‑impact surfaces—provided each layer is fully dry to avoid a thick, brittle finish.
- Can I use the same top coat for both gel and regular polish?
- Most top coats are designed for regular polish. Gel top coats are specifically formulated for gel nails and should be used accordingly. Using a regular top coat over gel polish may not cure properly and can lead to a chalky finish.
- What’s the difference between a high‑gloss and a matte top coat?
- A high‑gloss top coat gives a shiny, reflective finish, while a matte top coat offers a subtle, non‑shiny look. The choice depends on the aesthetic you want—glossy for classic looks, matte for modern or edgy designs.
- Will a top coat damage my nails if used too often?
- Using a high‑quality top coat sparingly and following proper removal techniques will keep your nails healthy. Over‑use of harsh removers can cause damage, but a well‑chosen top coat typically does not harm nails when used as intended.
- Can I skip the base coat if my nail polish is “base‑coat‑free”?
- Some polishes come pre‑mixed with a built‑in base. In those cases, an additional base coat is unnecessary. However, if you’re using a standard polish, applying a dedicated base coat remains the best practice for longevity.
- How do I remove a gel top coat without damaging the nail?
- Soak a cotton pad in acetone, place it on the nail, and wrap in foil for 10–15 minutes. Gently lift the pad; the gel should come off cleanly. Avoid forceful peeling, which can strip the natural nail.
For a deeper dive into nail prep, visit our guide at nailsmadesimple.com/nail-prep. For more information on nail polish chemistry, see Wikipedia: Nail polish.
Leave a Reply