
Short nails are the unsung heroes of the manicure world. Their practicality—quick to trim, low maintenance, and less prone to breakage—makes them a favorite for busy professionals, travelers, and anyone who prefers a clean, polished look without the fuss of long tips. Yet, many people underestimate the creative potential of a small canvas. With the right tools, a bit of patience, and a dash of inspiration, short nails can showcase a surprising range of styles, from ultra‑minimalist to subtly playful. Below is a comprehensive guide that takes you from the very first prep step to a polished finish that will turn heads at the office or on a night out.
Why Short Nails Are Ideal for Chic Designs
- They’re quick to prep and finish—perfect for a morning routine.
- They’re less prone to breakage, keeping your manicure intact.
- The compact surface allows for precise detailing without overcrowding.
- Short nails adapt seamlessly to any style—formal, casual, or trendy.
- They’re forgiving; small mistakes can be easily corrected with a quick touch‑up.
Tools & Products Every Short‑Nail Artist Needs
- Base Coat: A thin, clear base that dries quickly and offers a smooth surface. Brands like Essie Base Coat or OPI Base Coat work well.
- Top Coat: A high‑gloss or matte finish depending on your preference. Consider a quick‑dry top coat for time‑constrained days.
- Fine Nail Art Brush: A 0.5–0.8 mm tip is ideal for precise lines and dots.
- Dotting Tool: A small, round tip that fits into the nail’s natural curvature.
- Ruler or Stencil: For geometric patterns; a 2‑inch ruler works for most designs.
- Cuticle Oil & Nail File: For prep and maintenance.
- Alcohol Wipes: To clean the nail surface before painting.
- UV Lamp (Optional): If you prefer gel polish for longer wear.
Step‑by‑Step Preparation: The Foundation of a Flawless Design
- Trim & Shape: Keep nails at a comfortable length—usually 0.5–1 cm from the cuticle. A rounded or slightly tapered shape works best for most short‑nail designs.
- File & Buffer: Use a gentle file to smooth edges and a soft buffer to create a subtle sheen. Over‑buffering can thin the nail, so apply light pressure.
- Clean: Wipe each nail with an alcohol wipe to remove oils and debris. This step ensures better adhesion of the base coat.
- Base Coat: Apply a thin layer, avoiding the cuticle area. Let it dry for 30–60 seconds before adding color.
Choosing the Right Color Palette: Tone, Contrast, and Occasion
Color is the first impression. For short nails, subtlety often wins:
- Neutrals: Taupe, soft pink, dusty blue, or classic white. These work for business or formal settings.
- Pastels: Mint, lilac, peach. Ideal for spring/summer or casual outings.
Burgundy, forest green, navy. Great for fall and winter or a pop of color without being overwhelming.
When selecting colors, consider your skin tone and the outfit you’ll wear. For example, a warm beige nail base pairs nicely with a cool-toned dress, creating a subtle contrast that accentuates both.



Short Nail Art Ideas That Work
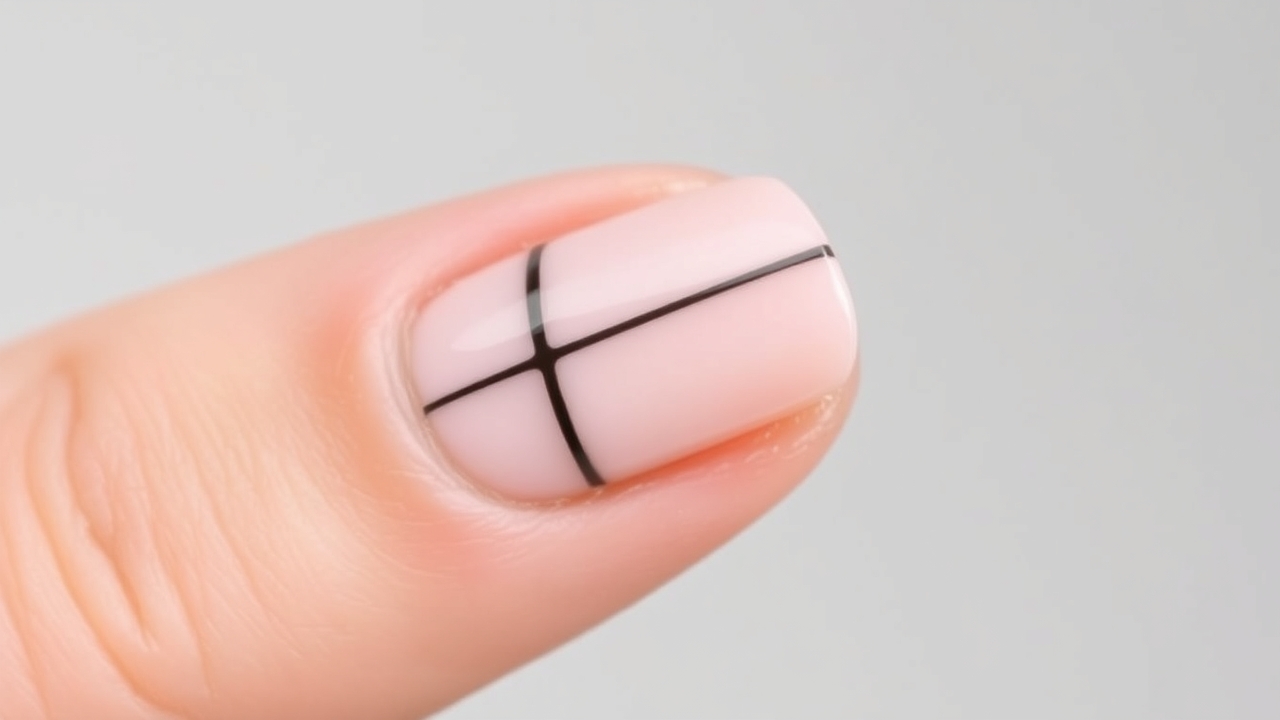
1. Minimalist Stripe
Using a fine nail art brush, paint a single horizontal stripe across the middle of each nail. A thin line in a contrasting color adds an instant edge without clutter.
Tip: Use a small ruler to keep the stripe perfectly centered. If you want a more dynamic look, try two parallel stripes spaced evenly.
2. Polka Dots
For a playful touch, dot small circles on the nail using a dotting tool or the tip of a toothpick. Keep the dots evenly spaced and uniform in size.
Variation: Alternate colors—one dot in a bright hue, the rest in a muted base—to create a subtle pattern.
3. French Tip Variations
Instead of the classic white tip, try a soft pink or even a subtle metallic tip. A gradient tip—starting with a pale base and fading to a darker hue—creates depth.
Pro tip: Use a small brush to fade the tip gradually; this technique works beautifully on short nails because the transition is subtle.
4. Geometric Shapes
A simple triangle or diamond centered on the nail can look sophisticated. Use a ruler or stencil for clean lines.
Example: A tiny diamond in a metallic shade on a pale blue base gives a modern, minimalist vibe.
5. Mini Floral
Draw a tiny daisy or a single leaf on the nail’s center. Keep it light and airy to avoid a crowded look.
Tip: Use a fine brush and a steady hand. A single accent nail per hand adds elegance without overwhelming.
6. Ombre Fade
Blend two complementary shades from the cuticle to the tip. A subtle fade on short nails can look like a soft sunrise.
Method: Apply the lighter shade first, then the darker shade on the tip. Use a small brush to blend gently.
7. Glitter Accents
Sprinkle a light dust of glitter on one nail per hand for a touch of sparkle. Use a clear topcoat to lock it in place.
Pro tip: For a more refined look, use a glitter topcoat instead of loose glitter.
8. Negative Space
Leave a small area of the nail unpainted—such as a crescent shape at the base or a strip at the tip—to create a modern, airy feel.
Example: A pale pink base with a white crescent at the cuticle gives a fresh, minimalist look.
9. Textured Base Coat
Apply a matte base coat and then add a glossy topcoat over the design. The contrast of textures adds depth.
Tip: Use a satin or matte topcoat for a subtle, sophisticated finish.
Applying the Design: Detailed Step‑by‑Step
- Base Coat: Apply a thin layer and let it dry completely (30–60 seconds).
- Color: Paint the chosen base color. Two coats usually give full coverage. Let each coat dry for 1–2 minutes.
- Design: Work on one nail at a time. Use a steady hand and small tools for precision. Keep the nail clean between strokes with a cotton swab and alcohol.
- Top Coat: Finish with a clear topcoat to seal the design and add shine. For a quick‑dry finish, use a topcoat with a 30‑second drying time.
- Drying Time: Allow at least 10 minutes per coat. If you’re in a hurry, a quick‑dry topcoat can speed up the process.
Common Mistakes to Avoid on Short Nails
- Over‑filing: Short nails are already thin; over‑filing can weaken them. Use a gentle file and stop before the nail starts to thin.
- Skipping the Base Coat: Even on short nails, a base coat protects the natural nail and improves polish adhesion.
- Using Thick Brushes: Thick brushes create uneven lines. Stick to fine‑tip brushes for precision.
- Neglecting the Cuticle: A clean cuticle area prevents polish from lifting. Gently push back cuticles before painting.
- Applying Too Many Layers: Too many layers can make the nail look heavy. Two coats of color and one topcoat are usually sufficient.
Maintenance & Longevity: Keeping Your Design Fresh
- Moisturize: Apply cuticle oil daily to keep the nail bed hydrated.
- Re‑seal: Reapply a topcoat every 7–10 days to maintain gloss and protect against chips.
- Avoid Harsh Chemicals: Wear gloves when cleaning or using strong detergents.
- Use a Soft Brush: When re‑applying topcoat, use a soft brush to avoid smudging the design.
- Address Chips Promptly: Spot‑treat chips with a small brush to maintain a seamless look.
Advanced Techniques for Short Nails
Once you’re comfortable with basic designs, experiment with these advanced yet simple techniques:
- Negative Space Gradient: Blend a gradient from the base to the tip, leaving a small unpainted strip at the cuticle.
- Mirror Finish: Apply a glossy topcoat over a matte base for a reflective, high‑contrast look.
- Metallic Foil Accent: Use a thin metallic foil on a single nail per hand for a subtle shimmer.
- Watercolor Wash: Blend two pastel shades with a damp brush for a soft, blended effect.
- Stenciled Patterns: Use pre‑made stencils for quick, clean geometric shapes.
Short Nails for Every Occasion
Business & Formal Settings
Opt for neutral bases with a single accent—such as a thin silver stripe or a subtle French tip. Keep the finish matte or satin to avoid a “glossy” look that can appear too casual.
Casual & Weekend Looks
Play with polka dots, mini florals, or glitter accents. A bright pastel base with a contrasting stripe adds personality without being over the top.
Seasonal Themes
- Spring: Pastel bases with tiny blooms or a soft gradient.
- Summer: Bright colors, subtle glitter, or a tropical motif (small palm leaf).
- Fall: Warm neutrals, metallic accents, or a muted ombre.
- Winter: Deep jewel tones, silver glitter, or a minimalist snowflake.
DIY vs. Salon: When to Call in the Pros
Short nails are perfect for DIY, but if you want complex geometric patterns or a flawless finish, a professional manicure can save time and ensure precision. Consider a salon visit if:
- You’re planning a special event and want a perfect, long‑lasting look.
- You’re new to nail art and want guidance on technique.
- You need a quick touch‑up on a busy day.
Budget‑Friendly Tips for Stunning Short Nails
- Buy a set of nail art brushes—often available in bundles for under $10.
- Use a single topcoat for both polish and design—this cuts down on product use.
- Opt for refillable nail polish tubes to save money over time.
- Repurpose old nail files and buffers—many are still effective for short nails.
- Shop seasonal sales for base and top coats—many brands offer discounts during holidays.
Internal Resources for More Inspiration
Check out our guide on our guide for more ideas and step‑by‑step tutorials that keep your nails looking fresh.
Frequently Asked Questions
- How often should I reapply polish on short nails? Reapply every 7–10 days, or when the topcoat starts to chip. Short nails tend to wear faster due to daily activities.
- What tools are essential for short nail art? A fine nail art brush, a small dotting tool, a ruler for geometric patterns, and a clear topcoat. A small mirror can help you see fine details.
- Can I use gel polish on short nails? Yes, gel offers longer wear but requires a UV lamp and careful curing to avoid damage. Short nails are ideal for gel because the thinner surface reduces the risk of cracking.
- How do I prevent my short nails from breaking? Keep them trimmed to a safe length, moisturize regularly, avoid harsh chemicals, and use a strengthening base coat with a small amount of vitamin E or keratin.
- What’s the best base coat for short nails? A thin, clear base that dries quickly and offers a smooth surface for color application. Look for a base coat that contains a light strengthening agent.
- Can I combine multiple designs on one hand? Yes—mix a stripe on one nail with a dot on another. Just keep the overall look balanced; avoid overcrowding.
- What’s the best way to clean up stray polish around the cuticle? Use a small brush dipped in nail polish remover or a cotton swab for precise cleanup.
- Is it okay to use glitter on short nails? Absolutely—just use a single accent nail per hand to maintain proportion. A clear glitter topcoat can give a subtle sparkle.
- How do I fix a chipped polish quickly? Use a small brush and a quick‑dry topcoat to touch up the chip. A quick fix usually takes less than a minute.
- Can I paint short nails in a hurry? Yes—use a quick‑dry base coat, a single coat of color, and a fast‑dry topcoat. The entire process can be done in 10–15 minutes.
Leave a Reply