
Summer nail designs easy are the perfect way to add a splash of sunshine to your fingertips without spending hours in the salon. Whether you’re headed to a beach day, a backyard barbecue, or just want a pop of color for your everyday routine, these DIY ideas keep it simple and stylish.
Choosing the Right Base Color
Before you dive into patterns, the base sets the tone. A well‑applied base not only protects your natural nail but also enhances the vibrancy of the topcoat.
- Light neutrals: A pale beige or soft pink offers a subtle canvas that lets bright accents pop without clashing.
- Bright pastels: Mint, lavender, or peach give a gentle pop while keeping the look airy.
- Classic white: A timeless choice that makes any sticker or stripe stand out.
Apply two thin coats for durability. If you’re working with a darker base, consider a clear topcoat to keep the surface glossy and protect the color from everyday wear.


Tools and Materials You’ll Need
Having the right kit can turn a simple DIY into a flawless finish. Here’s a quick checklist:
Basic Kit
- Base coat – protects natural nails and improves polish adhesion.
- Topcoat – seals the design and adds shine.
- Thin brush or nail roller – for stripes and fine lines.
- Sponges or cotton swabs – for gradients and ombre.
- Cuticle oil – keeps the nail bed hydrated.
- Lint‑free wipes – for cleaning before and after.
Optional Extras
- Stickers or decals – zero‑skill method for instant flair.
- Polish remover with acetone – for quick removal.
- Clear polish or glitter topcoat – to add texture.
- Mini nail file and buffer – for shaping and smoothing.
Classic Beach Nail Look
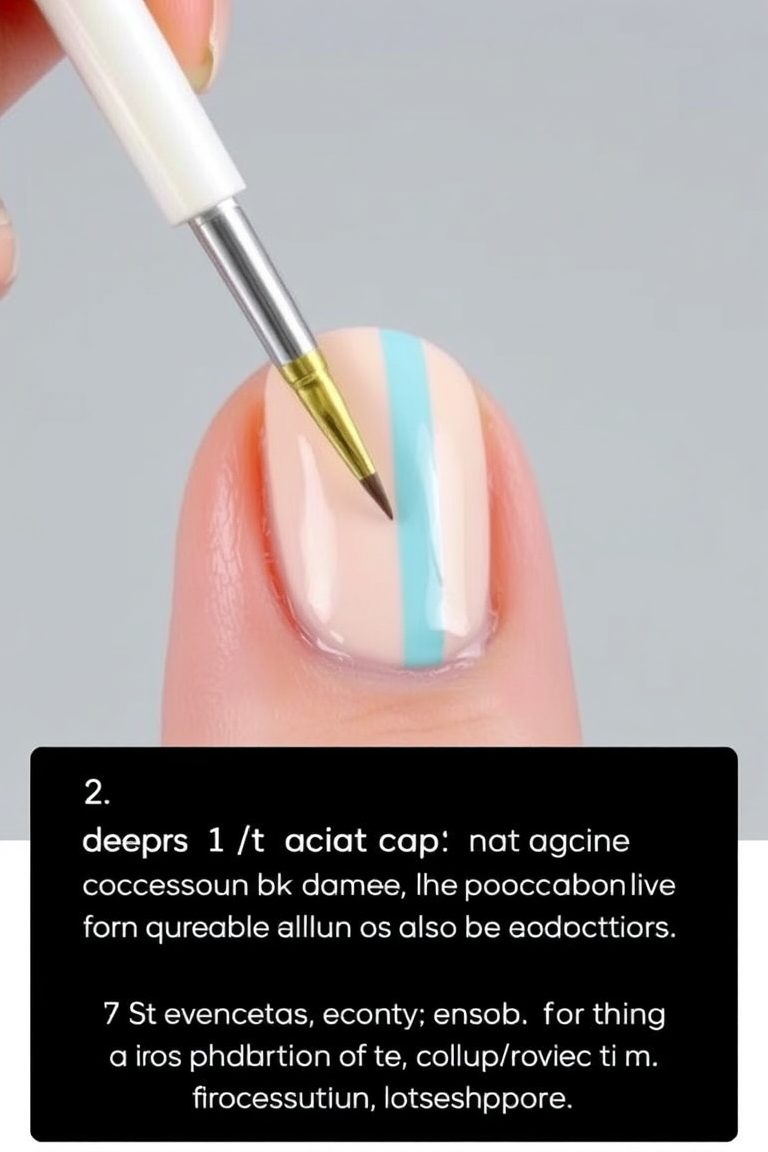
This minimalist style focuses on a clean line of color that mimics the calmness of the sea. Use a thin brush or a small roller to create a single stripe on the center of each nail. For a playful twist, alternate the stripe color between your base and a contrasting shade like turquoise or coral.
To finish, add a subtle shimmer to the stripe or a tiny shell accent using a dotting tool. The result is a beach‑ready look that’s easy to maintain.
Bright Summer Nails with Gradient
Gradients are a favorite for sunny days because they blend colors smoothly and add depth. Choose two complementary shades—say, coral and peach—and follow these steps:
- Apply the lighter shade first, covering the entire nail.
- While still wet, dab a cotton swab in the darker shade and gently blend it toward the tip.
- Use a clean brush to feather the edge for a seamless transition.
Let the polish dry completely before applying a topcoat to lock in the gradient and prevent smudging.
Easy Summer Nail Art Using Stickers
Stickers are a zero‑skill method for instant style. Look for themes like tropical leaves, flamingos, or tiny suns. Here’s how to apply them:
- Clean your nails with a lint‑free wipe and apply a base coat.
- Place the sticker on the nail, pressing gently to ensure full adhesion.
- Apply a topcoat over the sticker to seal it and prevent peeling.
Because stickers come in various sizes, you can create asymmetrical arrangements for a modern vibe.
DIY Ombre for a Sunset Effect
The ombre technique is simple yet eye‑catching. Choose a warm palette—orange, pink, and a hint of gold. Use a sponge or a cotton swab to blend the colors:
- Apply the lightest color to the base of the nail.
- Gradually add the middle tone, blending toward the tip.
- Finish with the darkest hue at the tip, feathering the edges.
- Seal with a clear topcoat.
For a smoother finish, let each layer dry before blending the next.
Maintenance and Longevity Tips
Even the most meticulous DIY manicure can fade faster than expected if not cared for properly. Follow these simple habits to keep your summer nails looking fresh for weeks:
- Topcoat at the end of each session: A high‑quality topcoat protects against daily abrasion and adds shine.
- Gentle hand washing: Avoid harsh chemicals; use mild soaps and lukewarm water.
- Daily cuticle oil: Keeps the skin hydrated and prevents dryness and cracking.
- Reapply topcoat on stickers: Every 3–4 days, especially after swimming or prolonged water exposure.
- Store nails properly: Keep them in a cool, dry place to prevent polish from softening or cracking.
Common Mistakes and How to Avoid Them
Even seasoned DIYers can make small errors that mar the finish. Here are the most frequent pitfalls and how to correct them:
- Skipping the base coat: Without it, polish may peel or chip faster.
- Applying too thick a coat: Leads to smudging and longer drying times. Thin layers dry evenly.
- Using a dirty brush: Residual polish can create streaks. Clean brushes after every color change.
- Over‑painting stickers: Too much topcoat can make stickers look cloudy. Use a light hand.
- Neglecting cuticle care: Dry cuticles can split and cause polish to lift.
DIY Nail Art for Different Occasions
Summer isn’t just about beach days. Tailor your nails to fit any event, from a casual brunch to a formal wedding.
Casual Brunch
- Soft pastel gradient with a light glitter topcoat.
- Minimalistic shell or star stickers for a subtle sparkle.
Pool Party
- Bright neon stripes or a bold tropical print.
- Water‑resistant topcoat to keep colors vibrant after splashing.
Summer Wedding
- Elegant white base with a thin gold line or pearl accents.
- Subtle ombre from ivory to blush for a sophisticated look.
Why Simple Summer Nail Designs Are a Must‑Have
Summer is the season of bold colors and carefree vibes. By mastering these easy techniques, you can create looks that match your mood—whether you’re looking for a subtle upgrade or a statement piece. The best part? You can swap out colors and patterns each week, keeping your manicure fresh and exciting.
For more inspiration and step‑by‑step tutorials, visit Nail Made Simple, where we break down the latest trends into manageable projects.
When selecting polish, keep in mind that the nail polish industry offers a vast range of textures—matte, satin, gloss—so you can tailor your look to any occasion.
Frequently Asked Questions
Summer nail designs easy: How long does a DIY manicure last?
On average, a well‑applied DIY manicure lasts between seven to ten days. Using a topcoat and avoiding harsh chemicals can extend this period. For a longer wear, consider a gel topcoat or a quick‑dry topcoat that seals the polish more tightly.
What tools do I need for these summer nail designs easy?
You’ll need a base coat, topcoat, a small brush or roller, a cotton swab or sponge, and optional stickers or decals. A clean nail file and buffer also help create a smooth surface. If you’re aiming for a more polished look, a nail stick or small dotting tool can add precision to thin lines.
Can I use these designs on natural nails or only on acrylics?
These techniques work best on natural nails. If you use acrylics or gel, be sure to apply the base coat compatible with your chosen nail type. Acrylics need a primer to prevent lifting, while gel polish requires a curing step before topcoating.
How can I prevent my stickers from peeling?
Apply a thin layer of topcoat over the stickers immediately after placement. Reapply a topcoat every few days, especially if you’re sweating or washing hands frequently. For extra durability, use a water‑resistant topcoat or sealant specifically designed for stickers.
What’s the best way to remove a quick summer manicure?
Use a nail polish remover with acetone for quick removal. For a gentler approach, soak your nails in warm soapy water for 10 minutes and then use a cuticle pusher to lift the polish. If you have sensitive skin, choose a non‑acetone remover and reapply a light coat of cuticle oil afterward.
Can I mix colors from different brands?
Yes, mixing brands can give you a wider palette, but be aware that different formulas may have varying drying times and adhesion qualities. Test a small area first to ensure compatibility, especially if you’re layering a clear topcoat from one brand over a colored base from another.
What if my nails are short or weak?
Use a nail strengthener or a clear base coat with added keratin. Keep your nails trimmed and filed to a uniform length, and apply a thin coat of topcoat to prevent breakage during the drying process.
Do I need to use a nail buffer before painting?
Buffering removes the shine from the natural nail, allowing polish to adhere better. Lightly buff the nail surface in a circular motion, then wipe away dust with a lint‑free wipe. Over‑buffering can thin the nail, so keep it gentle.
How do I fix a chipped or uneven line?
Use a small brush or a nail stick to carefully paint over the chipped area. For uneven lines, a thin strip of masking tape can help you achieve a straight edge before applying the polish.
What’s the best way to store my nail polish?
Keep polishes in a cool, dry place away from direct sunlight. Store them upright to prevent the liquid from leaking. If you notice a thickening or separation, shake the bottle well before use.
Leave a Reply