When you think of a flawless manicure, the polish color and nail shape usually steal the spotlight. Yet the real secret to a salon‑ready finish lies at the base of the nail – the cuticle area. If that skin is cracked, dry, or flaking, even the most vibrant polish will look uneven and unfinished. A simple, consistent cuticle care routine at home can turn that problem into a polished, healthy look that lasts.
What Exactly Is a Cuticle?
Many people use the term “cuticle” to describe any skin around the nail. In truth, the cuticle is a thin, translucent rim of dead skin that sits just above the nail plate. The thicker, living skin that protects the growth zone is called the eponychium. Cutting or damaging the eponychium can trigger infection or permanent ridges, so it’s vital to treat only the dead cuticle tissue.
Step‑by‑Step Routine for Home Care
Below is a proven routine that prioritizes hydration over harsh trimming. It’s designed to be quick enough for a busy weekday yet thorough enough for a weekend pampering session.


1. Cleanse and Soften
Start by washing your hands with a sulfate‑free cleanser to remove surface oils that can impede hydration. Then, immerse your fingertips in a warm bowl of water mixed with a drop of olive oil or a gentle soap. Let them soak for 5–10 minutes; the oil loosens the dead cuticle layer, and the warmth expands the skin’s pores.
For those pressed for time, a single-use chemical remover can soften cuticles in 2–3 minutes. Apply only to the outer edge of the nail, follow the instructions carefully, and rinse immediately to avoid over‑drying.
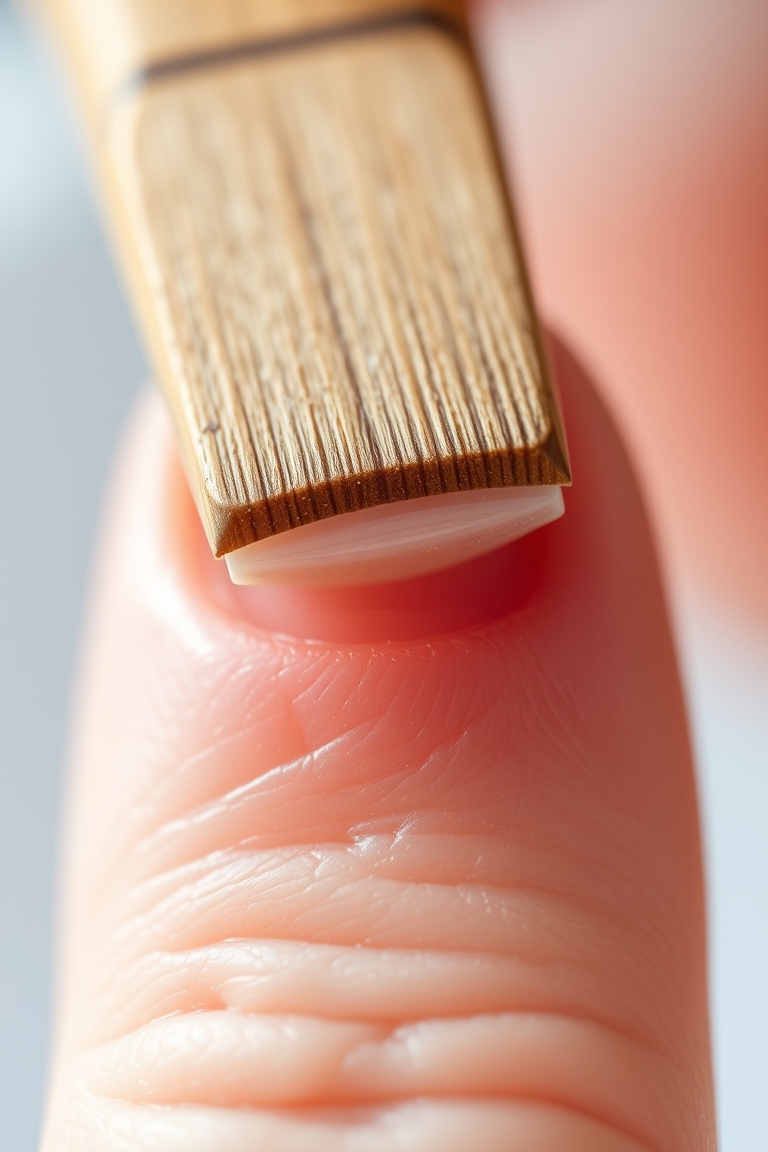
2. Push Back With Care
After soaking, the cuticle should feel pliable. Use a wooden orange stick or a silicone pusher—avoid metal tools unless you’re an experienced pro. Hold the pusher at a 45‑degree angle and apply gentle, even pressure. Glide from the center of the nail toward the sides, removing only the thin film of dead skin that clings to the nail plate. The goal is a smooth base for polish, not a dramatic lift.
3. Trim Hangnails, Not the Whole Fold
Identify the jagged hangnails that have torn away from the skin. With sanitized, sharp cuticle nippers, clip each piece at the base. Stop immediately if you feel resistance or pain—this indicates you’re cutting living tissue.
4. Exfoliate the Surrounding Skin
Use a fine‑grit buffer or a damp washcloth to gently rub the skin around the nail. This removes any remaining dry flakes and stimulates circulation, which can help nails grow more evenly.
5. Seal With Oil
Finish by massaging a high‑quality cuticle oil into the nail fold and the sides of the nail for 30 seconds per finger. The massage opens capillaries, allowing the oil to penetrate deeper. A recommended blend contains jojoba, almond, and vitamin E for optimal absorption.
For more on overall nail health, check out our guide on nails made simple.
Daily Maintenance: Small Habits, Big Impact
A deep cleanse once a week is good, but daily attention keeps the skin supple. Here are two quick routines that fit into any schedule.
Layered Moisture
Apply a thick hand cream to the palms and backs of your hands. Follow with a thin layer of cuticle oil. This “sandwich” method traps moisture and prevents evaporation.
Protect Against Harsh Chemicals
When washing dishes or cleaning, wear nitrile gloves to shield your skin from soap and detergent. If you need to use hand sanitizer, moisturize immediately afterward to counteract the drying alcohol.
The Power of Cuticle Oil
Oils differ from lotions in that they are occlusive and can seep into the nail plate. Their benefits include:
- Hangnail Prevention: Keeps skin flexible, reducing splits.
- Enhanced Nail Flexibility: Hydrated nails bend without snapping.
- Barrier Against Infection: A sealed cuticle stops bacteria from reaching the matrix.
- Visible Growth: Less breakage means nails appear longer.
Common Pitfalls and How to Avoid Them
Over‑Trimming
Trying to achieve a “clean” look by cutting too much can trigger the body to produce thicker skin. Stick to gentle pushing and hydration.
Dull Tools
A dull nipper tears the skin, leaving jagged edges that become painful hangnails. Replace or sharpen tools regularly.
Skipping Nighttime Care
Your skin repairs itself while you sleep. A heavy layer of oil or balm before bed lets the product soak in without interference from daily washing.
Tailoring the Routine to Your Nail Type
For Extremely Dry or Cracked Skin
If you work in a wet environment or wash your hands frequently, switch to a thicker ointment with beeswax or lanolin. These create a stronger barrier against water loss.
For Oily Skin
Heavy oils can feel greasy. Look for “dry” oils or serums that absorb quickly, such as argan or grapeseed oil.
For Fragile Nails
Limit chemical cuticle removers. Warm water soaks soften the skin naturally without compromising the nail plate.
Long‑Term Results of Consistency
Consistency is key. After two weeks of daily oiling, you’ll notice softer skin and a cleaner base. After a month, hangnails become rare, and your polish stays on longer. The overall look shifts from a DIY job to a professional finish.
FAQ: Mastering Your Cuticle Care Routine
How often should I perform a full cuticle care routine at home?
Do a full routine—soak, push, trim—once every 7 to 14 days. Hydration (oil and cream) should be a daily habit, ideally twice a day.
Can I use olive oil as a cuticle oil?
Yes. Olive oil is rich in vitamin E and fatty acids, making it a cost‑effective, natural option. Professional blends often add faster‑absorbing oils, but pure olive oil works well.
Is it okay to use a cuticle pusher every day?
No. Daily pushing can irritate the fold and push bacteria into the matrix. Limit pushing to once a week or every two weeks.
Why do my cuticles keep peeling even though I use lotion?
Lotion targets surface moisture. For deeper hydration, switch to a cuticle oil with smaller molecules that penetrate the skin.
What should I do if I accidentally cut my cuticle?
Stop immediately, clean the area with mild soap, apply a small amount of antibiotic ointment, and cover with a bandage. Avoid harsh chemicals on that finger until it heals.
Leave a Reply